
Currently, there are 3.8 billion smartphone users in the world and this number is going to increase much more in the future; this situation poses a security risk for companies and people. Speaking about security, most of the companies around the world use Cyber Ranges to train their personnel, the problem is that current-generation Cyber Ranges do not take into account smartphones. This is a serious problem and it is mandatory that future generation Cyber Ranges must fulfill this need. For these reasons we decided to take a step forward in this direction and developed a small container-based framework for Android emulation (and hacking), we called it Dockerized Android.
Container-based Android emulation
The main purpose that induced us to develop this framework was the creation of a building block to work on in the future to add all the features that are needed in a complete Cyber Range. We focused on Android for the following reasons:
- It is open source
- It runs on nearly every device
- There are a lot of tools that can easily be integrated to provide extended features
Another reason for focusing only on Android is related to compatibility issues: in the resulting system the Android Emulator is used and it is both open source and compatible with all host operating systems (Linux, Windows, and OS X). The iOS Simulator, on the other hand, is a closed platform and can be run only on OS X, thus making it impracticable to test and work on without a machine running OS X. The choice to opt for a Container-based solution is related to the increasing importance and usage of this kind of virtualization over the traditional virtual machine approach in current applications.
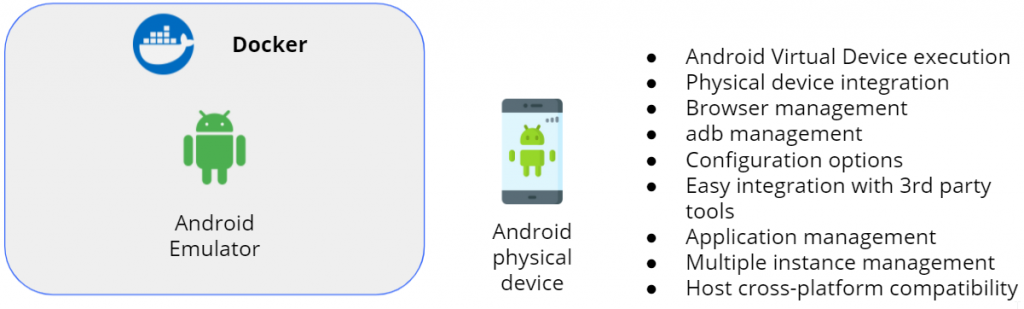
The image above summarizes all the requirements we wanted to meet during the development:
- Android virtual device execution
- Physical device integration
- Management from browser
- Management from adb
- Configuration options
- Easy integration with 3rd party tools
- Application management
- Multiple instance management
- Host cross-platform compatibility
The next paragraph shows the final result.
Dockerized Android showcase
This paragraph provides a series of figures that show the final result of the system, of course, these figures depict only the visual part of the system (SPOILER ALERT: the UI component). When the user browses to the page of the UI component, the first thing showed is a dialog that asks the setup configuration mode:
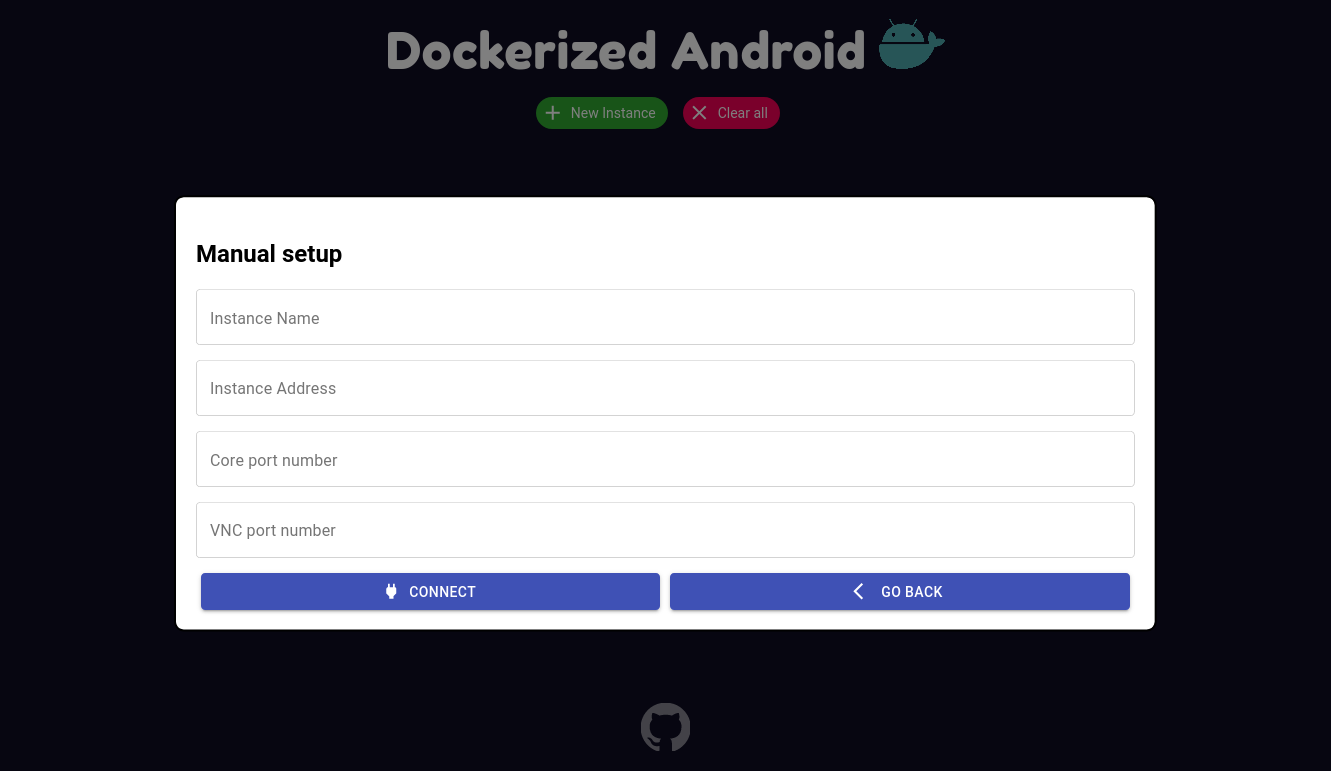
4 mandatory informations must be inserted for each component (name, address, core port, and VNC port). That’s because the framework uses websockify in order to translate normal socket calls into WebSocket calls to enable using VNC into the browser (yep, that’s an oversimplification, I know. Let’s just leave it this way). Anyway, after inserting those informations the result is the following:
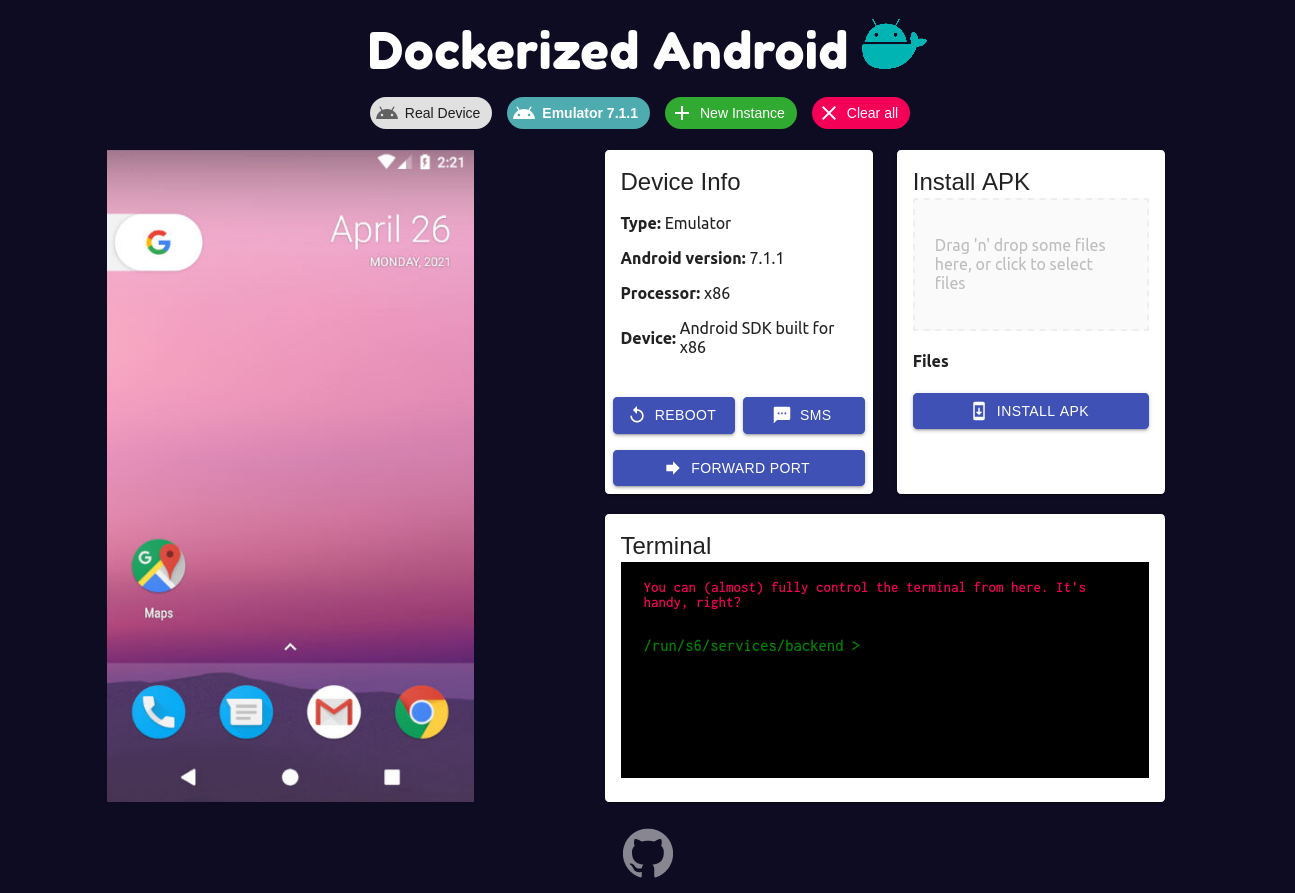
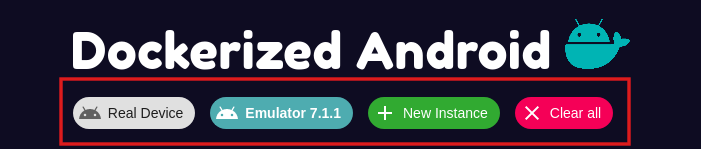
From the row below the logo the user can:
- Switch to another device
- Add a new instance
- Clear the current configuration
The left part of the application shows the device which can be controlled using both keyboard and mouse. The right part, on the other hand, provides all the features exposed by the backend in the Core component:
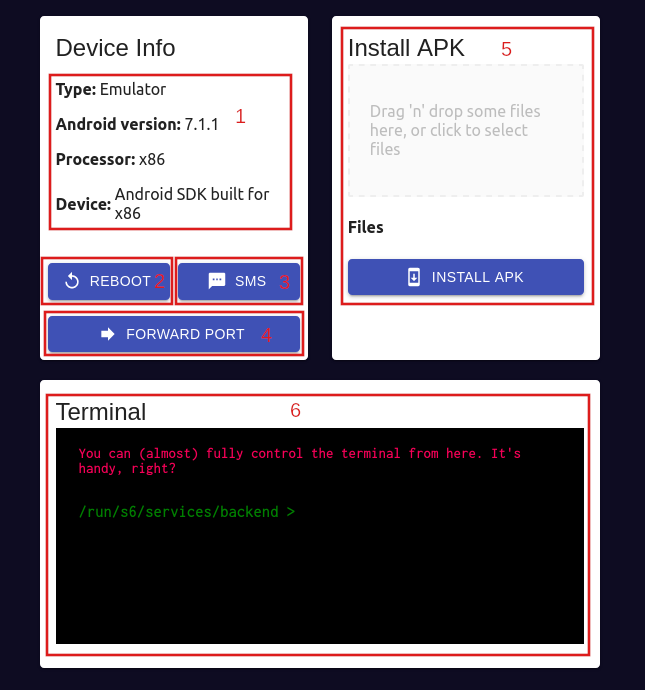
- Show info about the device
- Button to reboot the device (only emulator)
- Button to simulate an SMS (only emulator)
- Forward a port
- Install an APK
- Use a terminal from the browser
Architecture overview
The composition of the system is described using a top-down approach: in the following figure the architecture of the project is shown including all the specifics and the technologies used to build it:
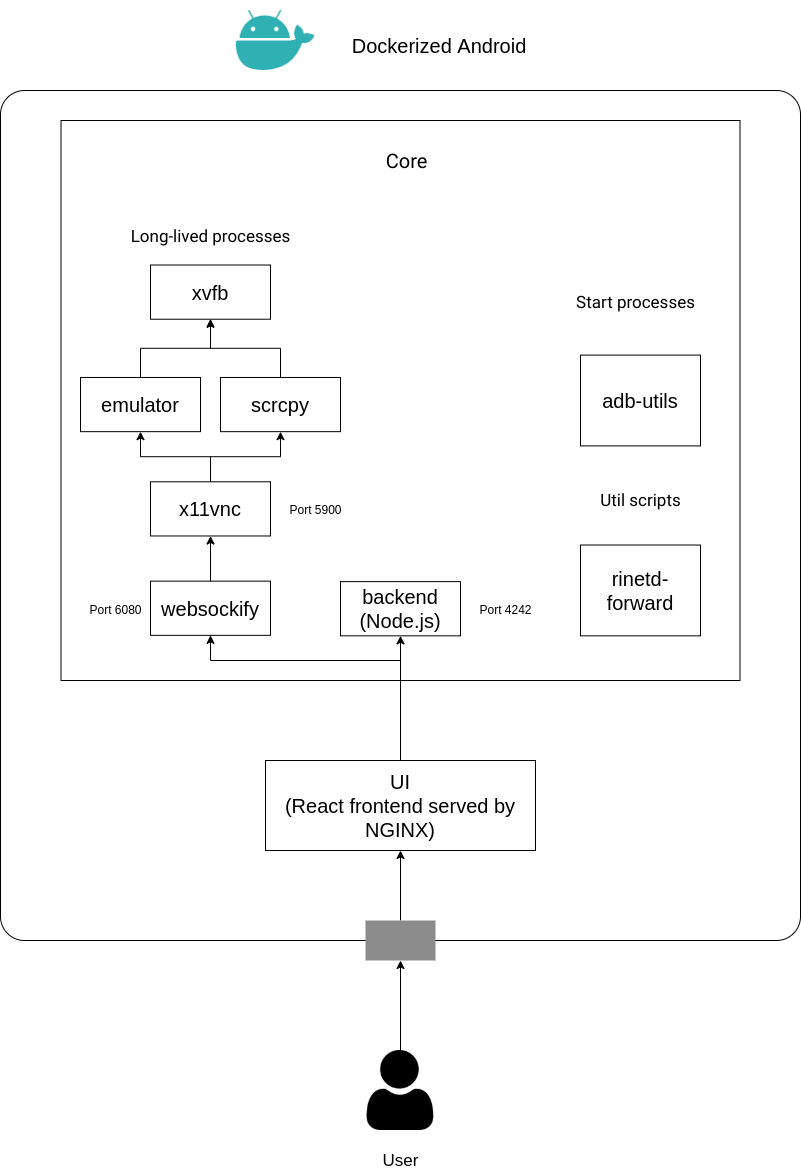
As shown in the previous figure, the architecture can be divided in two parts:
- Core: executes all the processes needed to run an Android Component (Emulated or Real) inside a Docker container, also exposing some features to the outside.
- UI: gives to the user a UI to access the Core component in a simpler way through a web browser.
Core Component
The Core component is with no doubt the most complex part because it has to manage different processes in order to provide a set of features. The previous figure shows a clear distinction between long-lived processes, start processes, and util scripts. Besides this figure shows that there are 6 long-lived processes, this is a little inaccuracy added to provide a general overview of the Core component, in reality, there are two different flavours of the Core component:
- Core for Real Device
- Core for Emulator
As stated in the requirements the resulting system must be able to integrate also a physical device. The Docker image that is used to run with a physical device and the one that is used to run an emulator have different dependencies and requirements to fulfill. The main architectural difference is the one regarding the long-lived processes: the Core for Emulator runs the long-lived emulator process while the Core for Real Device runs the long-lived scrcpy to display and control the physical device. The other parts are quite similar with just some logic to follow a different behavior based on the type of the Core component.
UI Component
The UI component, as stated in figure 4.1, is composed by a React Frontend and is served through an NGINX server. This happens because the code developed in React is built in static HTML
and Javascript files and needs to be served by a web server. The UI is developed using the most recent features provided by the React framework like Hooks and Context in order to have follow the principle of strong cohesion and loose coupling. The features provided by the UI are the following:
- Display and Control the mobile device
- Get information about the device
- Use a terminal from the browser
- Upload and install APKs to the device
- Reboot the device (only emulator)
- Send an SMS (only emulator)
- Forward a port
In other terms, the UI provides a simple way to use all the features exposed by the backend and also adds the ability to display and control the device. The user has to manually insert the address of the Core component and the corresponding ports (the port exposed by the backend and the port exposed by websockify); through this manual setup it is possible to change the default ports (which are 4242 for the backend and 6080 for websockify).
Multiple instances management
The UI component allows the user to manually setup the address (and also the ports) of the core component to display/control from the browser. Besides, the UI component can
also address multiple Core components at the same time through a simple switch that allows to change the current displayed device. But what happens when there are a lot of devices (i.e. Core components) to address? It becomes really painful to manually setup all the addresses, for this reason, an additional (and optional) component was developed to address this problem: the Instance Manager component.
Upon the access on the UI component from a web browser two choices are given to the user:
- Manually set the address (or addresses) of the Core component(s)
- Just insert the address of the Instance Manager Component
This component, in fact, has the job to provide all the informations (i.e., addresses and ports) about the running Cores through a single REST API. This is done by writing a simple JSON configuration file that contains all the information about the Cores that are present into the docker-compose in order to avoid the painful job of manually adding one by one.
Conclusion
In this post we showed how it was possible to create a framework that allows the execution of an Android virtual device inside Docker and enable also the usage of a physical device. This framework is just a start and many advanced features needs to be added (like a library of pre-defined actions to simulate user behavior) to have a full-fledged mobile hacking solution. Anyway in one of the next post we will show how it is possible to (almost) completely reproduce a cyber kill-chain using Dockerized Android. If you want to explore more about the framework you can take a look at the source code on Github.
…And don’t forget: Cybersecurity is sexy.